How to Import OST to Apple Mail? Complete Guide
Here is a quick guide on how to import OST to Apple Mail clients. You can do it with the help of the expert tool. This utility is designed with advanced algorithms to migrate every single email from an OST file into an Apple Mail or Mac Mail client. A user will obtain a separate MBOX file for each OST email with this tool.
OST Files are Created by Outlook when an account is configured with Exchange Server. OST stands for Offline Storage Table files which enable the users to work in Offline mode with MS Outlook without requiring an Internet connection.
When the connection gets resumed, all the data from the OST file is automatically synced with the Exchange Server. OST files are responsible for storing all Outlook account and mailbox information. It may include Emails in folders, Contacts in the Address Book, Events and Reminders in Calendars, Tasks, Notes, Journals, To-do lists, etc.
Apple Mail often referred to as Mac Mail is a default email client for Mac OS users. One can easily configure accounts of Gmail, Yahoo, Rediffmail, AOL Mail, Rackspace Mail, and GMX Mail into Apple Mail. Apple Mail allows you to save & import emails.
Hence, many users are planning to import OST to Apple Mail clients. But, to do so, they need to first convert OST to MBOX file format. Because Mac Mail supports MBOX format, for this process follow the mentioned tool.
Smart Solution to Import OST Files to Mac Mail
So, to import OST to an Apple Mail client, a user must need to change the file to MBOX or EMLX format. You can do it easily with RecoveryTools OST Migrator which allows batch conversion of multiple OST files. This toolkit is designed to simplify the complete process of OST to EML conversion. Use it to effortlessly import OST to Apple Mail email clients.
Download the Given Tool for a Hassle Free Process
Free Trial Limitation: The utility is also available for free to use. During the trial, it allows the users to convert the first 25 emails. Hence, to remove this limitation and perform unlimited conversion of mailbox items, A user only needs to purchase the required license.
Simple Steps to Upload OST to Mac Mail
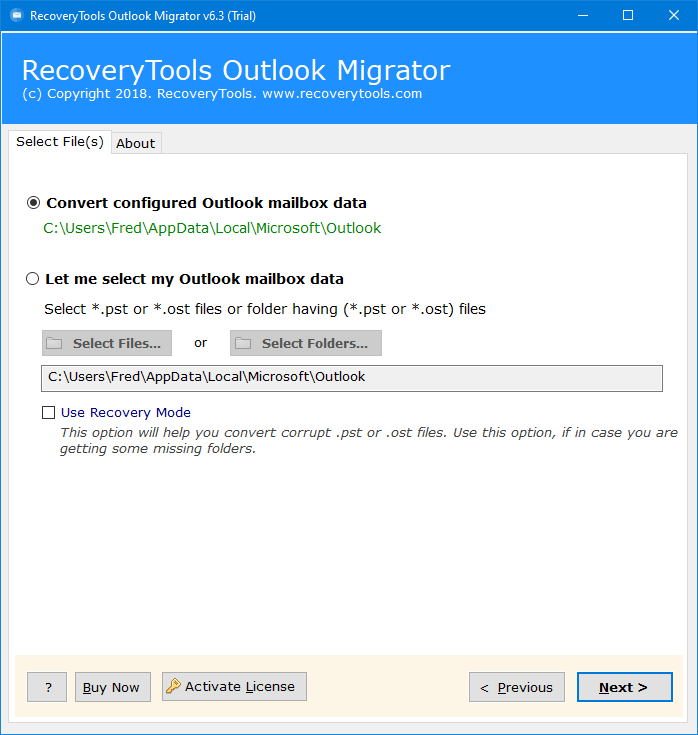
- Step 1: Install & load OST files in the software.
- Step 2: Choose all the desired mailbox folders.
- Step 3: Select the MBOX from the saving list.
- Step 4: Set up OST to Apple Mail Conversion.
- Step 5: Click on Convert to import OST to Apple Mail.
Advanced Benefits of OST to Apple Mail Converter
- This application provides many advantages to its users including a simple User Interface, Easy working, etc. The software performs the conversion of both PST & OST files, making it easier for the users. Here are a few benefits of this tool:
- It retains all the internal folder structure & hierarchy of the mailbox items and also preserves all the Metadata properties of emails like To, Cc, Bcc, Subject, Date, etc.
- After email extraction, all emails are kept in a structured format by keeping the folder association in the same way.
- The import OST to Apple Mail software is a completely standalone utility without requiring any third-party application. It does not require MS Outlook installation for its work.
- The OST to Mac Mail Migrator software is a 100% safe & secure application. It does not cause any data loss while converting OST to Apple Mail using this Safe & Secure tool.
- The advanced filter option allows users to upload the desired and required data via Date Range, To, From, Subject, etc. Also, it allows users to remove empty and unwanted folders as per choice.
Complete Steps to Import OST to Apple Mail
- Install & run the software on your system and hit the Next icon after reading all the instructions.
- Load OST files from the Source path using the Select Files and Select Folders options and hit the Next button.
- All the contained folders and subfolders will appear and select the required data as per your choice.
- Choose MBOX as a saving option from the Select Saving Option.
- Click on the Filter Options tab and apply the advanced filters for selective OST to Apple Mail import process.
- Click on the Browse (Folders) icon to select the desired location as per your choice.
- Hit the Next button to import OST to Mac Mail account.
- After the complete process, a confirmation message will appear, and hit the OK button.
Get More Solutions:
The Verge:
In this article, we have explained the best and safest methods to import OST to Apple Mail account. We have used the expert tool for this process because manual methods take a long time. The mentioned tool comes with amazing and advanced, which allows users to import multiple OST files and folders to Mac Mail in bulk at once without having file size limitations.


