How to Move OST File to Another Drive? Complete Guide
This write-up will explain how users can move OST file to another drive using both manual methods and expert tools. Here we have mentioned complete information with a step-by-step guide to copy OST file to new computer easily. Read the complete blog first and then choose the right method as per your choice.
When we talk about email clients, Outlook is the first name that comes to our mind. Because it comes with advanced features and filters, these advanced features make it the first choice of users to send and receive emails and to manage their professional and personal data.
MS Outlook uses PST and OST formats to store complete data including emails, contacts, calendars, notes, journals, tasks, etc. PST stands for Portable Storage Table, which was created by default. And OST (Offline Storage Table) is created when your Outlook account is connected with IMAP or Exchange Server.
In addition, it allows users to work in offline mode without any internet connection. Somehow your OST file is corrupted or is an orphan, then you can not import OST to Outlook account easily.
However multiple times users want to move OST file to another drive. But they don’t know the right method because of a lack of knowledge. So don’t worry, here we will explain all the information in the right way.
How Do Copy OST File to New Computer Manually?
Important Note: This method works only when your OST file is healthy and must be connected with your Outlook email client.
This method is divided into two steps, both steps are given below one by one.
- Open your Outlook on the old computer.
- Choose Open & Export >> Import/Export from the File tab.
- Select the Export to a File option.
- After that, choose the Outlook Data File (.pst) option.
- Select the OST folder from the list and hit the Next icon.
- Choose the location to save the resultant data.
- Enable the required features and hit the Finish button to move OST file to another drive.
Now move this exported PST file to the new computer through a pen drive or any other method. Follow the another step:
- Launch Outlook on new computer.
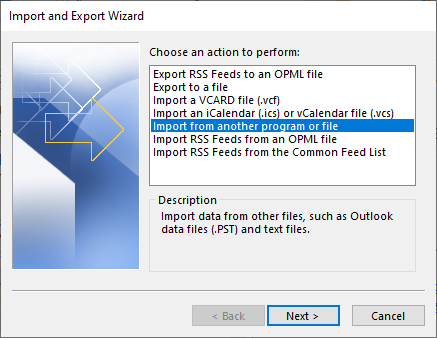
- Select File >> Open & Export >> Import/Export option.
- Choose Import from Another Program or File option.
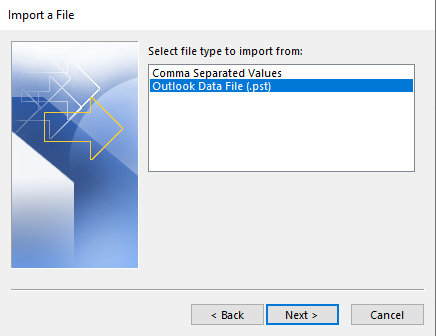
- Select the Outlook Data File (.pst) option from the list >> Next.
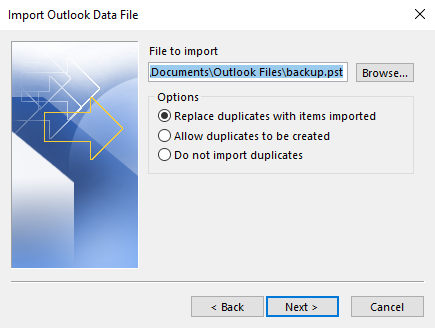
- Browse the exported PST file from the system.
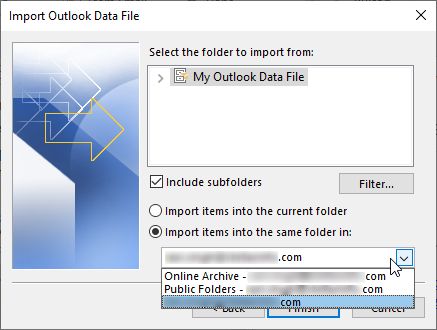
- Select the location to save it as per choice.
- Hit the Finish button to move OST file to another drive.
Drawbacks of Manual Methods
- OST file must be connected with an Outlook account.
- This method will not work with corrupted, damaged, or orphan OST files.
- Outlook account must be set up with a subscribed account.
- High risk of data loss while moving data from one to computer.
- Also, your exported PST file could be corrupted completely.
Expert Tool to Move Outlook OST File to Another Drive
If you have an orphan, damaged, or corrupted OST file, and you want to move OST file to another drive without facing any error, then you should download the RecoveryTools OST File Converter Tool. This software allows users to copy or move all types of OST files exported from any Outlook version.
This software has been created with amazing and advanced features, which makes it more unique and powerful than other brands’ software. also, users can easily move unlimited OST files to another computer in bulk at once without any file size limitations. more phenomenal features are given below in detail with step by step process.
Download the software to copy OST file to new computer using the given button.
Quick Steps to Move OST File to Another Drive
- Step 1: Download the tool on your PC.
- Step 2: Upload your OST files/folders.
- Step 3: Check the needed folders/subfolders.
- Step 4: Choose the saving option as needed.
- Step 5: Select the location using the Browse icon.
- Step 6: Hit the Convert button to start the process.
Complete Steps to Move Outlook OST File to Another Drive
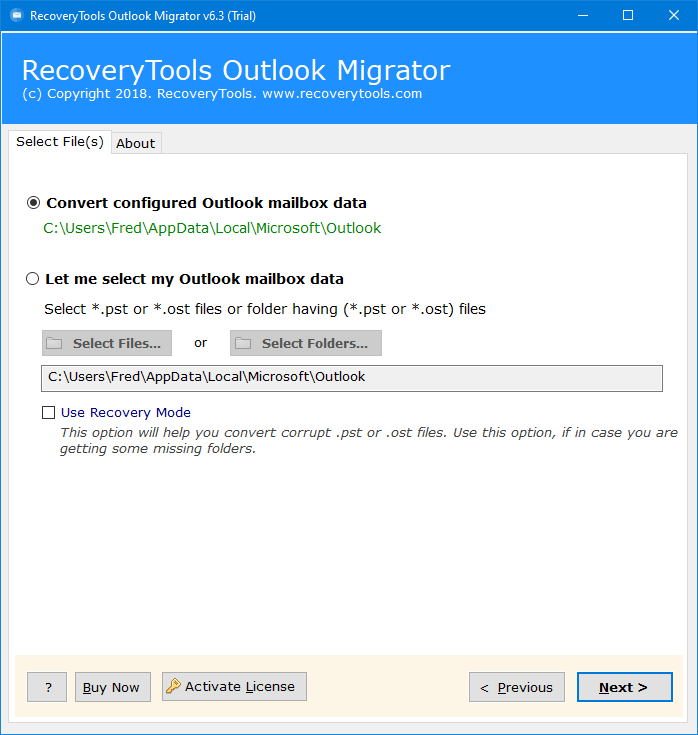
- Download and install the tool on your system and click on the Next button after reading all the instructions.
- Here you will get dual options to load single or multiple OST files and folders using the Select Files and Select Folders options.
- After that, all the data will show on the software panel, check the needed folders and subfolders as needed and hit the Next button.
- Next, choose the required saving type from the Select Saving Option like PST.
- Apply the advanced features to move OST file to another drive selectively via Date Range, To, From, Subject, etc.
- After that, enable the required advanced modes as per choice including Separate PST per user, Change Language, and Split PST, etc.
- Click on the Browse (Folder) button to save the resultant data file as per requirement.
- Lastly, click on the Convert or Next button to move OST file to another drive.
Why Users Should Choose Expert Tool Over Manual Methods?
- This software provides dual options to load single and multiple OST files and folders using the Select Files and Select Folders options.
- The advanced features allow users to move selective emails and folders via Date Range, To, From, Subject, etc. Also, you can remove empty and unwanted folders.
- Also, it has two advanced modes i.e., Separate PST file per User and Split PST into 2 GB, 5 GB, 10 GB, and 20 GB.
- This software supports all types of OST files including corrupted, damaged, orphan, and inaccessible files.
- Users can save their resultant data at the selected and desired location using the Browse button to copy OST file to new computer.
Time to Say Goodbye
Here we have explained the complete information with a step-by-step process to move OST file to another drive. In this blog, we have used both manual methods and expert tools. You can take the help of manual methods, while your Outlook is working properly. Otherwise, you can use the advanced tool, it comes with amazing and advanced features. This tool comes with a free demo version to move only 25 emails from each folder. So users can easily analyze this tool.


